|
Last weekend, Danial and I teamed up to host another historical demonstration at Uhuburg Castle at their CastleFaire event. What we did not realize going into the event was that our first day was about to become a research project on weather’s impact to sword and buckler. Bundled in cloaks and wool in our period clothing to combat the cold, Danial and I fought through the mud and the rain in front of a small crowd to better understand what the cold, rain, and the mud would do to our technique. My ObservationsThe first significant change to my historical kit was the inclusion of the cloak to help insulate myself and keep me warm. After researching, I selected the bocksten cloak by Grommet Leathercraft because of the historical evidence of this cloak style. It also freed my sword hand, which felt like an advantage over a more traditional cloak like what Danial chose. With the cloak thrown back to free my buckler hand, the cloak minimally impacted my overall technique and even assisted in a blade grab where Danial’s sword got caught in my cloak on a missed thrust. My footwear remained the same simple leather shoes I had worn for other historical demonstrations. These shoes feature little tread, forcing me to use shallow steps like I had to do with different rough terrain sparring. Unfortunately, even while trying to maintain these shallow steps, I still slipped when stepping forward to attack my opponent. Fortunately, I never fell into the mud, but more arm and rib cuts occurred than deeper target hits on days 2 and 3 of the demonstration. The risk of over-extending was likely the culprit for this because I did not want to slip in the mud reaching for a thrust to miss and get hit by Danial. While my shoes had been soaked through, my feet were not wet thanks to the assistance of the chausses I was wearing. The shoes even dried out before the second day which was an added bonus. 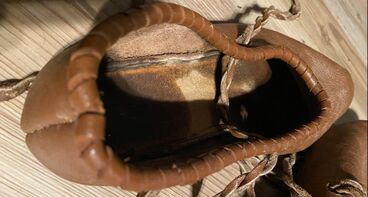 Danial’s ObservationsFrom a perspective of fighting in Historical Clothing/footwear in inclement conditions, footwear significantly impacts the bad conditions. Clothing hinders and protects in equal measure, but historical footwear is objectively a downgrade. A long cloak was used to stay warm for the demonstration. The cloak I used prevented the utilization of several wards (Namely 1st and 5th), even when thrown back over the shoulders. This was due to the risk of tangling a sword in the cloak and being unable to respond to a siege or any other defensive action required. However, it did provide some level of protection from strikes when it turned blades flat or, better yet, slowed blows to allow for grabs or other entangling actions. Beyond that, the length of a woolen cloak (especially one close to the ground) can stretch while wet, which increases the risk of slipping or tripping, which did happen on several occasions. This led me to use much tighter and more controlled lunges and steps, even with modern shoes. Footwear now is an entirely different story. The slick conditions of rain and mud were nearly ignored while using modern soles, and this allowed me to exploit a lunging distance that was unopposed by a fighter wearing historical shoes. The ability to put this consideration out of my mind certainly gave a mental advantage in the fight as it was one less thing to consider with actions. Knowing that my opponent was wearing historical footwear also allowed me to press my advantage to advance and retreat much faster than he could safely, which defeats a common maxim (It is faster to advance than retreat). So, as anyone could conclude, any step up in footwear will pay dividends, especially as the ground conditions become worse. Closing ThoughtsWe were both acclimated to the temperature after standing in the rain and lecturing for minutes before sparring. We also had the opportunity to survey the ground during this time, which allowed us to think about how we would fight in the muddy and rainy conditions. Ultimately, fighting in rain and mud felt similar to other rough terrain I had experimented with. However, I may have felt slow and sluggish if the heavy rain had soaked my clothes. Thanks to our cloaks, most of our layers were protected from the rain, allowing us to fight freely without being soaked. Because of this, I believe that cloaks for rainy weather were more beneficial to preserving swordsmanship technique in the rain than we had initially considered going into the shows for this weekend. As always, we had a blast teaching and demonstrating historical fencing to the visitors of Uhuburg Castle. We had a great time meeting new people, trading sword stories with others, and making history fun for everyone. We owe a huge thank you to the staff of Uhuburg Castle for running an excellent event. We also want to thank Ash, Rachelle, and Don, our support staff, for helping our table booth run smoothly. 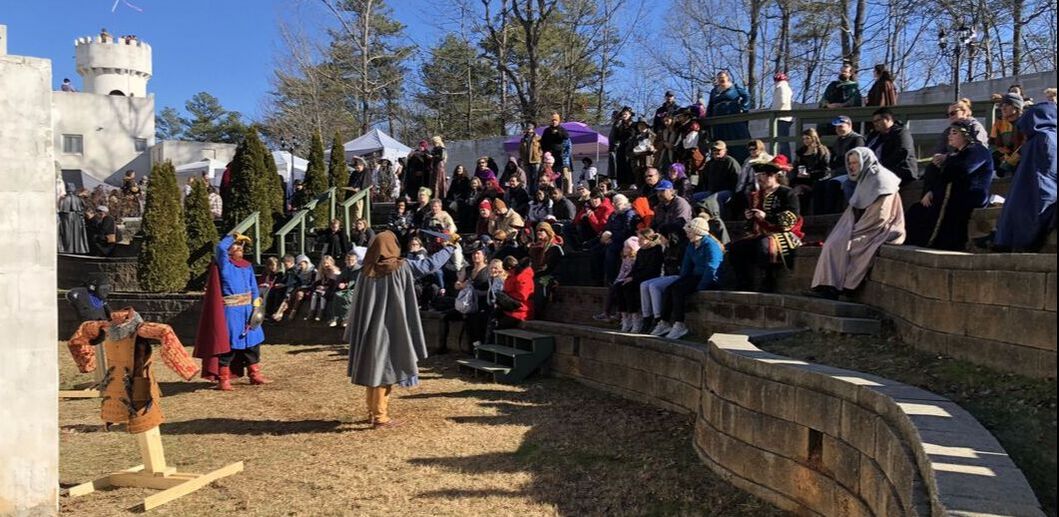
0 Comments
With the construction methods of the buckler project showing consistent durability, it is now time to push the envelope. The D.3 buckler was designed to reduce overall weight by reducing the thickness of the buckler from .5” to .25”. A better rawhide liner will also be used for this buckler to improve impact resistance over the rawhide bones that were used in previous D bucklers for the project. Most of this post was written prior to the buckler failure. The second half of this post (indicated by the part 2 in the title section) begins the post-break research portion of the D.3 Buckler. ConstructionThroughout the construction, parts of the buckler were measured to understand better where the weight came from. The results of these measurements are shown at the end of this section. This buckler followed a similar construction method as the previous bucklers. First, the planks were cut and then overlayed to make the face of the buckler. Walnut boards were used for this buckler mainly because it was available in .25” thickness. 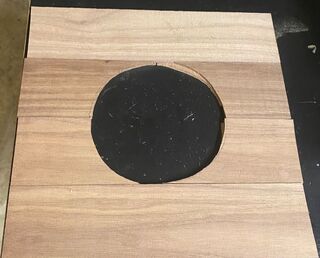 Little project wood boards were used to create a handle solution for this buckler. Layers of the little boards were overlayed to add some amount of structure. The little pieces were then glued together and allowed to cure before attaching to the face of the buckler. 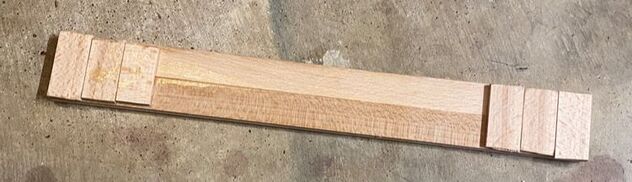 Once the handle was glued together, it was then glued to the buckler face boards. 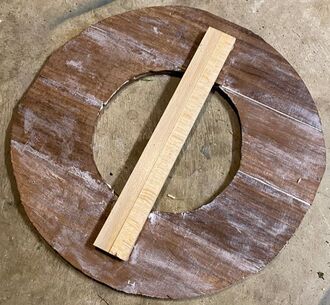 Next, the boss and liner were attached to the wooden structure like prior buckler constructions for this project. The rawhide was soaked and then fitted around the edge of the buckler and tacked down. Clenched nails were used to secure the boss in place. 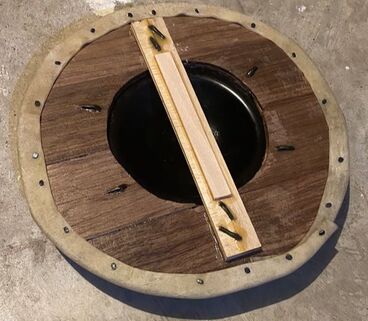 The buckler was then covered in a layer of wood glue to provide resiliency. This was a change done for this buckler because prior constructions oiled the wood. 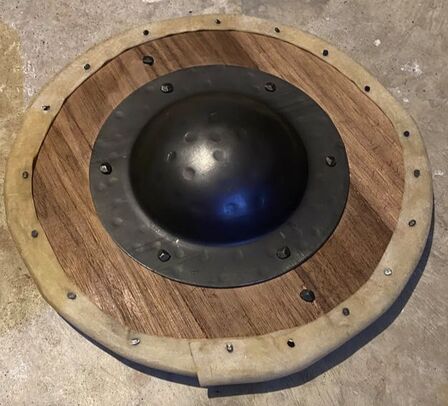 Once the liner had dried, the buckler was weighed. Wood body: 266 gr Handle 45: gr Boss: 523 gr Without liner weight: 860 gr Final weight: 981 gr Durability TestingThe buckler withstood sparring against a messer, a longsword, and another sword and buckler. Similar to previous bucklers, this buckler took the hardest hits by the messer, and while some of the nails came loose, the clenching prevented the nails from being freed. Longevity Testing This buckler has been my buckler for nearly 3 months (roughly 30 classes) with very little damage. The nails on the boss had to be replaced due to impact on the boss, but even when the bucker was down to two nails, the boss stayed in place and lived to make it to the end of a practice when repairs could be done. Tacks for the liner have come off, but the hardness of the liner has secured it in place. Near month 2, the overlapping section of the liner was pulled up while sparring. The liner was not destroyed and later glued back down to secure it. Interestingly, wood under the liner has been chipped away. Instead of cracking a board, these chips have just slowly been whittled away with time. This seems to be a testament to the quality of the liner and how a good liner can make a difference in the survivability of a buckler.
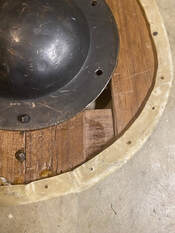
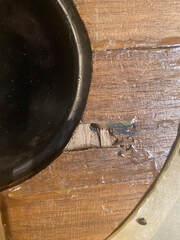
Observations I am stunned that the lego-brick style handle has survived but I believe that shows how much impact force the rest of the buckler mitigates. The light weight of the buckler also allows for good positioning in the later parts of a sparring match when fatigue is setting in. Failure (Beginning of Part 2)After just over 4 months, the buckler suffered a major failure. A plank cracked near the top of the buckler. This is the section where most of the impact force from descending cuts was received on the buckler. After the sparring match when this occurred, the top section felt loose which seemed to indicate both layers of the planks had been compromised. After the crack occurred, I sparred with the buckler one more time (first to 10 points) to see if the failure would prevent the buckler from being able to complete the match. To my surprise, the buckler was able to finish the sparring match. I believe this is a testament to how much work the rawhide liner does at cushioning impact force on the wood itself. However, even though the buckler successfully did its job, sections of the plank where the crack occurred had clearly broken loose and were only held in place by the liner. The loose pieces were removed to inspect the damage.
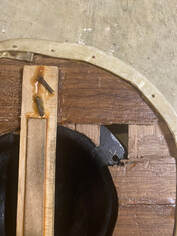
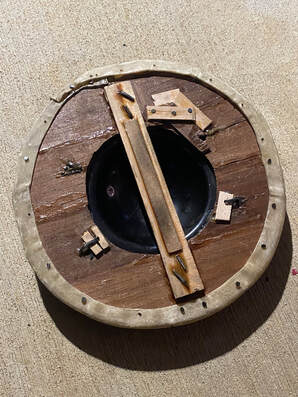
As I had suspected during sparring, both layers of the planks were broken, which compromised the structure. Interestingly, the nail on the opposite side of the buckler from the broken planks was torn off and the wood cracked. This could have been unrelated or the boss transferring impact force differently. Could the buckler still perform? Maybe if I changed which side was on top. However, at this point the buckler was fighting for its life. It was time to retire it from this research project. Or was it? Field Repair TestSome of the bucklers in The Book of the Buckler feature what appears to be reused wood from other bucklers. A rough field patch may be sufficient to get more life out of the buckler. In the spirit of reusing wood that I already had lying around, the broken-off pieces and the lego-brick style would be used for the handle would be used for repair. I started with patching the broken areas with smaller wood planks that I could shape to fill the broken areas. Next, some of the broken wood and more of the smaller plank were applied to the back of the buckler to provide some structural support to the broken section. This was done if more cracking had occurred that was not identified. Finally, new planks were placed where the nails go since the planks in those areas had been worn and could use more friction to hold the nails in place.
The repair was only put through durability testing due to the more compromised state of the buckler as a whole. The repairs were able to survive multiple rounds of sparring without issues. The small plank in the bottom left of the back-view was split during construction and not during sparring.
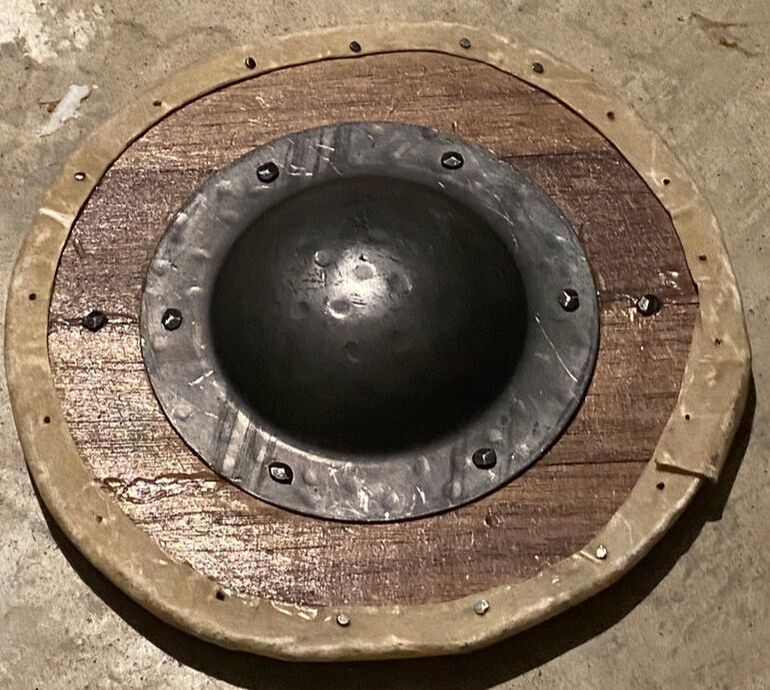
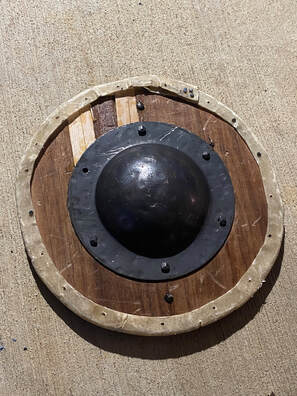
However, while the bucker was able to perform, there was still some looseness in the section that had failed. This was likely due to the broken sections warping and not aligning as well as initially, even with the structural boards added. Ultimately, while the repair "worked", it seems more likely that the good planks would be preserved while the overall wooden structure would be remade while still re-using the boss, liner, and possibly the handle. With this buckler, the aim was to better understand the weight to the buckler to see where the weight could be reduced without compromising the structural integrity. This buckler also included lessons learned from both J.1, J.2, and D.1 to improve the overall quality. ConstructionI ordered new wood from the same source as the D.1 buckler since it proved to be a reliable source. Unfortunately, there was a clear difference between the last lot of wood and the newest delivered. This would prove to be a design challenge to work around but did not impact the buckler’s construction too significantly. 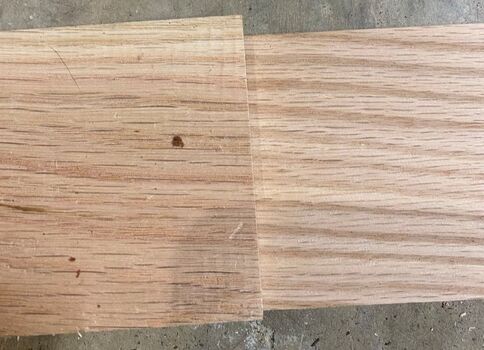 Like the previous buckler construction, the planks were cut to size and the hole for the hand was cut into four of the planks (two for each layer of the buckler). Some wood filler was added to one of the planks to make up for some of the thickness issues. 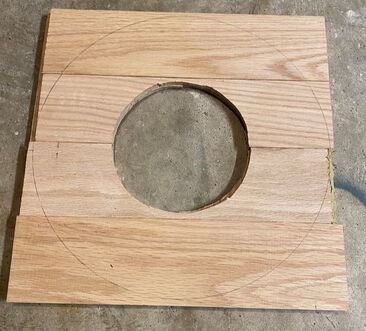 Next, hinged nails attached the boss and the handle to the wood. I decided to use a larger buckler than the last buckler, so I had more room for my fencing gloves. Smaller holes were drilled for the nails after the lessons learned from D.1 I also chose to use a flatter and wider handle that did not extend to the rim of the buckler due to issues I had with some techniques while using D.1. 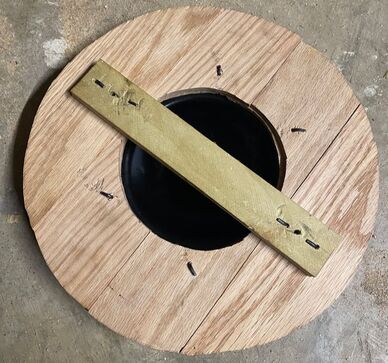 For the liner, I soaked the rawhide bone in brown tie dye. In previous testing, Jerod had confirmed that soaking rawhide in coffee could stain the rawhide. Unfortunately, this left a very potent coffee smell. So instead, I used a brown dye. Finally, the liner was attached to the buckler. Instead of hinged nails, I secured the liner with tacks like J.1 and J.2 used. The last step was to add the wood resin to darken the wood. 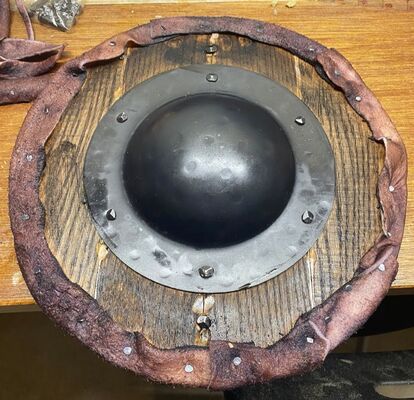 Weight AnalysisThe following measurements were taken during construction to better understand the weight of the buckler:
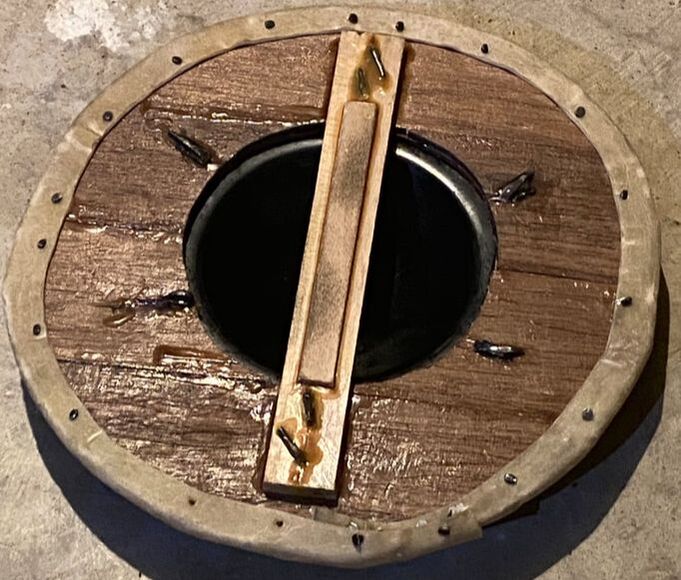
The final weight of the buckler was 1243 gr. TestingThe buckler has completed its durability and longevity testing. The buckler survived with visible damage to the liner. Interestingly, the boss started to rattle immediately after using it during sparring. At first I thought it was the hinged nails coming loose. However, it appears that the boss was warped and more raised in some sections than others. I believe this occurred while hinging the nails. I used a wood block to prevent the nails from knocking loose which may have created enough sponging of impact force to warp the boss. For the next buckler, I will use an anvil to brace the nails instead. ObservationsOverall, I am very pleased with this buckler. I was able to reduce the weight from my previous design quite a bit while still ensuring structural integrity. While the boss does rattle, it appears to be insignificant and not a risk to the buckler’s structure. The nails also did not split the wood like what was seen in D.1.
Unfortunately, I am not as satisfied with the handle. It feels a little too wide and too thick. I have been disarmed from my buckler a number of times while sparring because I lost my grip. For the next buckler, this will need to be addressed. Finally, based on the weight analysis, it would appear the only way left to reduce the weight of a wooden buckler is to decrease the thickness of the layers of wood or to use a different wood. I have not been impressed with the performance of softer wood bucklers so the next step is to see how thin I can make the buckler. |