|
We are continuing our historical buckler research with a second buckler made by guest writer, Jerod. This buckler explored the use of different hardwood and its impact to the buckler performance. ConstructionThe testing of j.1 provided valuable feedback and data for buckler j.2. Most noteworthy was that j.1 was too thick (¾”) increasing its weight. The weight was not unmanageable but would fatigue most testers in a 10 point match. Second was that two layers of boards with the grain in a perpendicular orientation would reduce strain on a single layer’s butt joint and prevent any cracking from propagating fully through the buckler. I also sought to improve the producibility of the buckler (ease of manufacturing) and improve the ability to hold it with a modern armored glove. For this build I used walnut instead of red oak for the face of the buckler. My thought here was the walnut is still a hardwood, but might help reduce the overall weight of the buckler and every gram helps. Also this buckler would be 12” instead of 14” in diameter as well as two layers of ¼” boards bringing the total thickness to ½”. 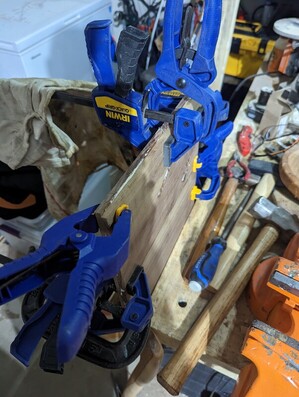 Rather than starting by cutting each board I instead started with the joints and glued the two layers together, clamped and left for 24 hours. Once the glue had dried I proceeded to mark the outer diameter of the buckler face and made an initial rough cut to shape. I then used the belt sander to smooth the edges and achieve the desired round shape. 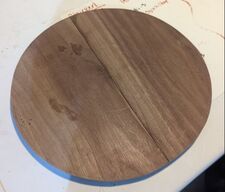 With the outer shape cut I moved to the inner hole. For this I used a 5 ½” holesaw. With the initial hole created I then used a rasp to open the inner diameter and ensure it was smooth and the desired roundness. I then sanded and rounded the edges to reduce likelihood of injury when in use. This method was much easier to initially cut, but the final sanding was made more difficult by the fact that the joined planks prevented use of the belt sander. Future versions I will use a larger hole saw to get closer to the final inner diameter.  I then turned my attention to the handle which I made from yellow pine. The thought here was the handle does not take impacts and could be a softer, lighter wood. And perhaps even the softer wood would lend some energy absorption from heavy blows. I also shaped it less as a straight “bar” of wood and more of an arch shape to move the hand away from the buckler and provide room for modern armored gloves.  Next I used clinched nails to secure the handle and pop rivets to secure the boss to the wood face.  With the structure of the buckler complete I moved on to finishes. Applying linseed oil to protect the wood from moisture and tacking on the leather lining. For this version I pre-marked the tack holes on the leather strip at 1” spacing to provide a cleaner final look. I also overlapped the seem of leather to prevent a damaging blow like what happened with j.1. Below buckler j.2 (right) is shown alongside j.1 (left). Next up, testing! Final weight of j.2 was 1286g. 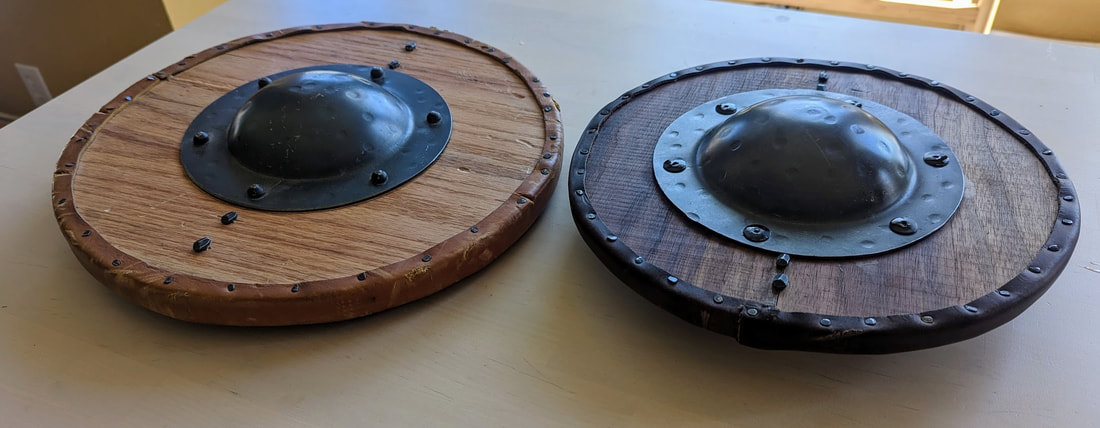 TestingIn use the 12” x ½” buckler is significantly lighter than the 14” x ¾” buckler which was expected. In use it felt no heavier or more cumbersome than a 12” metal buckler. It continued to exhibit the “sponging” properties of the wooden bucklers. In practice I found it to be sturdier than the original j.1 build thanks to the adjustments made to the lining, and multilayer construction. The walnut also did a better job at reducing deep gouges. I suspect it’s from the slightly softer wood giving more and absorbing energy rather than “cracking” under hits. One disappointment was I had grown accustomed to the additional protection afforded by the 14” j.1. In fact I plan on making a j.3 that will be 14” in diameter but utilizing the construction methods of j.2 to reduce weight. After many weeks of testing the overall wear of j.2 is minimal and I would anticipate it holding up for many months of rigorous training. The reductions in weight and improved handle are a big contributing factor to its overall usability.
0 Comments
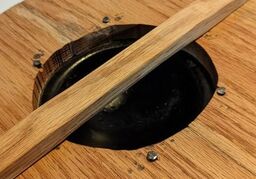
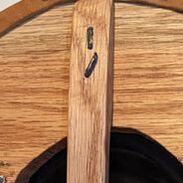
With Jerod making his J.1 buckler, I decided to continue to improve on the prototype design while not copying some of the design factors of Jerod’s buckler so we could test different design features independently. This blog post captures the design, construction, and performance of the D.1 buckler. Design After the P.0 buckler failed, it was back to the drawing board. The failure point of the rivets and the board had me going back to the historical evidence on bucklers. Herbert Schmidt pointed out that many wooden bucklers used layered planks perpendicular to each other so I decided to explore that as a durability feature. I was not convinced that Jerod’s design with the two planks would pass the durability test (a fact I was later proven wrong for) so I decided to use eight planks. Four would make up the front with four running perpendicular on the back. Another issue seen in the J.1 design was the overall weight. I hoped that the plank design would allow me to cut down on overall thickness without sacrificing durability. Another change I tried to improve this was to use a smaller boss for the buckler. Unlike the J.1, I continued to use a raw-hide wrap. However, instead of using rope to hold the raw hide in place, I would use nails to secure the liner. I decided to change the wood to a red oak similar to the J.1 design. This felt like a better option than the original poplar wood used and proved to be light and durable. Finally, in the spirit of history, I decided to use the wood from the P.0 buckler because historical bucklers have been seen featuring recycled wood (likely from damaged bucklers). Creation of the Buckler I started my construction with 3” wide boards of red oak. After measuring and cutting the planks, I applied linseed oil which I hoped with reduce the risk of cracking while nailing the boards. However, the linseed may have caused issues during the assembly process which I touch on later in this post.  Next, using a compass, I drew circles on the four boards that would be cut to make room for the hand behind the shield boss.  After cutting the circles, the planks and handle were glued together to form a square-shaped buckler. Immediately after gluing the planks and handle together, I stained the wood with an epoxy, making measuring and cutting difficult. I will not be doing that again. 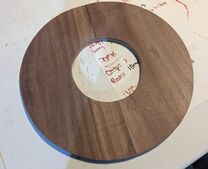 Unfortunately, during the curing process of the wood glue, the planks had warped, resulting in gaps on the edge of the buckler. This was addressed by gluing the edges, clamping them down, and restarting the timer for wood glue curing for the assembly.  I suspect this occurred because the linseed was still soaking into the wood and the changing temperatures in my garage did not create the most ideal environment for the planks. Luckily, the clamp fix worked and the edges were cut down during the rounding process of the buckler. Next, it was time for the raw hide. The raw-hide bone was softened by soaking the bone in water and then wrapped around the buckler. Clenched nails were used to secure the raw hide to the buckler (which added a significant weight). Some of the more raised areas of the raw hide were clamped down for the drying process. After a few days, the raw hide had dried into a strong and durable liner for the buckler. 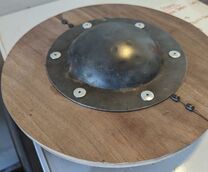 The final step was to nail the handle to secure it while also nailing the boss to the buckler. The over-use of clenched nails was more for practice than for practical use. Ultimately, the nails secured the buckler but there was a fair amount of looseness in the boss that I will need to avoid for the next buckler. To add a bit to the aesthetics of the buckler, I used the epoxy stain on the raw-hide to try and change the color a bit. Jerod ran a test to show that coffee can stain raw-hide during a drying process which may get used in a later buckler. The final buckler was 12” in diameter and 1337 grams in weight. This weight was heavier than I wanted (likely because of all the nails along the buckler's circumference). However, the buckler weight was manageable and ready for its testing to begin. 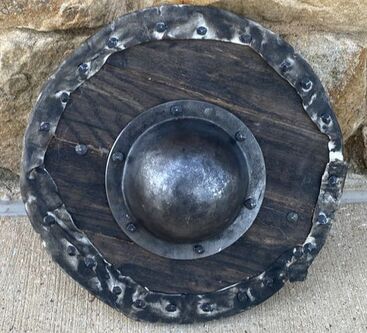 Durability Testing The buckler withstood sparring against a messer, a longsword, and another sword and buckler. The buckler took the hardest hits by the messer and while some of the nails came loose, the clenching prevented the nails from resulting in a failure of the buckler. For another fun test, the buckler was used against someone fighting with two sabres. The buckler took incredibly hard hits during this test and ultimately only experienced superficial damage to the liner. Longevity Testing The buckler has completed 50% of its longevity testing. After week 1, I used wood glue to prevent the nails' looseness. However, this did not solve the looseness of the nails. After week 2 of longevity testing, cracks have formed near some of the nails. 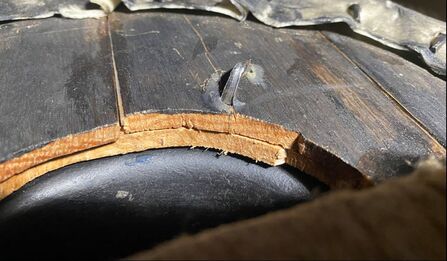 Crack that occurred near the nail holding the boss. Fortunately, this crack only occurred on the interior layer of the planks, so the buckler is still functioning. The boss is loose, but the nails keep it connected to the buckler. I suspect that the cracking observed is due to the looseness of the nails. I had drilled rather large holes in the planks before hammering the nails in. When constructing D.2, I used smaller holes which did not result in the wood cracking. This has led me to the suspicion that the pre-drilled holes were too wide, which has allowed the nails to be loose. This looseness in the nails allows for strikes against the wood from the nails while using the buckler, which creates enough force to crack the wood. One way this could be solved is by removing the nails and rotating the boss. Then new holes and nails can be used to re-secure the boss to the wood. I have decided not to do this repair until after the month-long longevity testing to see the extent of damage this failure point will cause. The D.2 buckler will be tested with the smaller holes and clenched nails to test the hypothesis that this is what is causing the cracks in the wood. Observations While the buckler has been described by one of my students as looking like “Goblin Tech,” I am pretty pleased with its performance. The raw hide still seems like an excellent choice for a buckler liner because it can bind against an opponent’s blade resulting in a tacky feeling in a fight. This is a huge improvement over metal bucklers for techniques like the shield-strike. One issue I had with the buckler from a technical perspective were cuts along the circumference of the buckler. The raised handle often resulted in the cut getting stopped along the buckler. This was most apparent when throwing cuts from first ward. Notes for the Next Version The J.1 buckler proved that tacks are the way to go for the liner of the buckler. Even 40 tacks did not measure up to a gram on my scale. This is a dramatic weight reduction over the 30 grams of each 1.5” nail added. The nails are also relatively far away from the buckler's edge because I feared cracking the wood. Tacks would allow me to cut the raw hide back further, allowing for a cleaner-looking edge of the buckler.
Unfortunately, the smaller boss did result in some of my preferred off-hand gloves not fitting into the buckler. As much as I love the newer boss because of its large dome shape, I think I will have to go back to the generic bosses found with the wider diameter and smaller profile. Another change that will be needed is to reduce the handle's thickness. The Grommet Leathercraft buckler handle design has proven to be effective for me with I.33 techniques so I may use that as inspiration for the next buckler. This post is by Jerod who is one of the students at VBHF. He has graciously volunteered to work on this project with me. This also marks the first ever guest writer for Funky Buckler! IntroductionWith the testing of the first prototype wooden buckler completed I sought to increase the longevity and durability of the buckler. the first prototype failed in fewer than 4 matches which is a pretty low benchmark to try and improve on. Design Phase First, I selected red oak as it is a harder wood and would hopefully be more resistant to gouging and chipping. 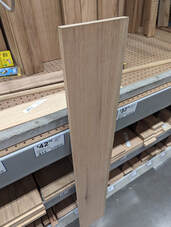 Second, I went with 2, 3/4“ thick boards that were 7” x 14”. My hope was that the simpler construction would eliminate joints that could be prone to failure. 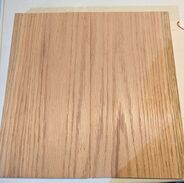 Additionally I altered the fasteners used and clenched 4, 2” long wrought nails to secure the handle as well as solid rivets to secure the boss to the planks.
Creation PhaseConstruction of the buckler began by cutting the board into 2, 14” planks with the remaining wood to be used in part for the handle. With the 2 boards now the length and combined width needed to create the buckler, j.1 is 14” in diameter, I temporarily fastened the two boards together to measure out the inner and outer diameters of the buckler. 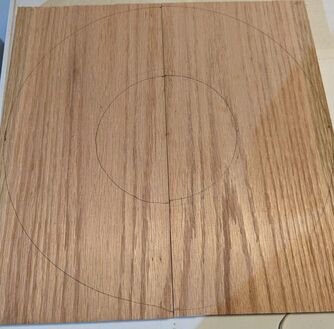 I then cut the handle from the remaining wood and using the belt sander rounded the grip, tapered the ends and smoothed the edges to make it more comfortable for the user. 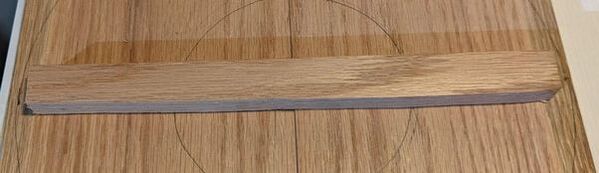 Next I individually rough cut each board with a jigsaw to get the general inner and outer shape. Then, ssing a belt sander I removed the remaining material to reach the desired inner and outer diameter as well as to smooth the surfaces. 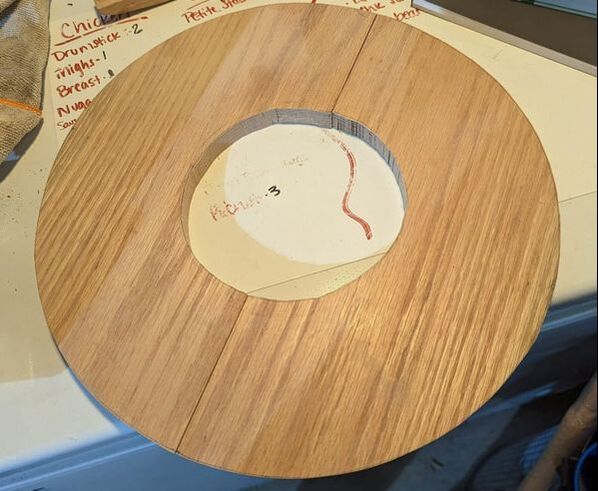 To join the two boards I applied wood glue to the butt joint, clamped and let dry for 24 hours. Once the wood glue fully cured I attached the boss with the solid rivets. Linseed oil was applied to the wood to allow the grain to “pop” as well as protect against moisture and cracking. 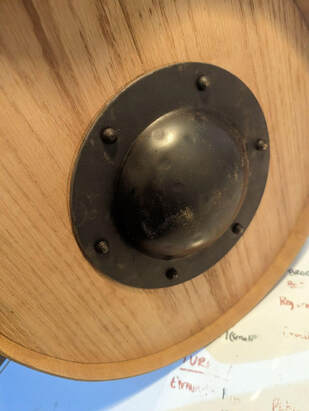 For the lining I used a single, full grain leather leather strip that was 2” wide. Softening the leather in water for a few hours made it more pliable and easier to work with while attaching. I measured out the leather to the circumference of the buckler (a flaw that would be identified later in testing) and fastened with upholstery tacks.  The final step was to drill out the holes for and fasten the handle. For this I utilized 2” wrought iron nails that would be clenched on the backside to add extra strength.  Fully assembled the 14” diameter, ¾” thick wooden buckler weighed 1920 grams. 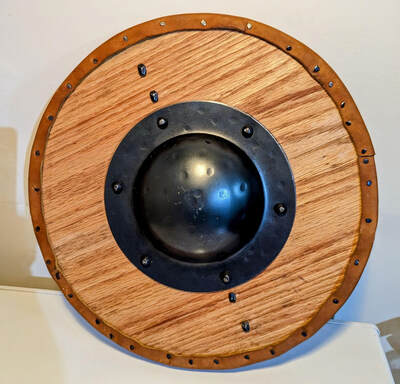 ObservationsIn test sparring matches the buckler has held up remarkably well with a few noteworthy findings. First, while the buckler is 2” larger than most used by Vier Blossen it results in a fairly heavy buckler. In use most testers didn’t find it to be an unbearable strain to use considering the weight, but it is worth noting. Future iterations will attempt to reduce the overall weight. More importantly the leather lining has held up remarkably well and does a good job at absorbing the energy of a blow and reducing an opponent's blade “bouncing” making recovery from an attack slower. However an issue emerged in one of the first tests with how the lining was wrapped around the buckler. In construction I butted the two ends of the leather strip together and tacked it to the buckler. This resulted in a small, but undesirable flaw. A blade is capable, and did, split the gap between the two ends striking the wood directly. This resulted in a hairline crack that runs all the way to the boss and is fully through the thickness of the wood. As a team we decided to allow “field” repairs, or simple touch ups between matches that could quickly and easily be accomplished with minimal tools. In this case I applied some wood glue to the crack to try and minimize further propagation. Otherwise the buckler has only sustained superficial damage, such as dents to the face of the wood, 2 of the lining tacks coming loose, scratches on the boss. None of these have resulted in a loss of functionality or protection that the buckler provides. Additionally the clinched nails to secure the handle have resulted in a tight bond between the handle and buckler body and has yet to loosen. Considering all the findings the buckler has sustained approximately a month of testing with minimal issues. My goal is for future iterations to maintain the robustness of the design while reducing the overall weight. Completed Testing and Closing ThoughtsAfter a month of testing, utilizing the buckler for multiple sparring sessions every week, its condition remains largely unchanged from its initial sparring session. The crack that developed did not propagate further, the handle remained tight, the lining was nicked but intact. Throughout the month a number of the tacks holding in the lining liberated and were lost, but were easily replaced with no tangible effects on the buckler’s use. After a month of use I also came to appreciate the extra 2” diameter that the 14” buckler gives over my usual 12” diameter buckler. As a result I will likely work on a 14” design that is thinner, like j.2, and that reduces the overall weight. 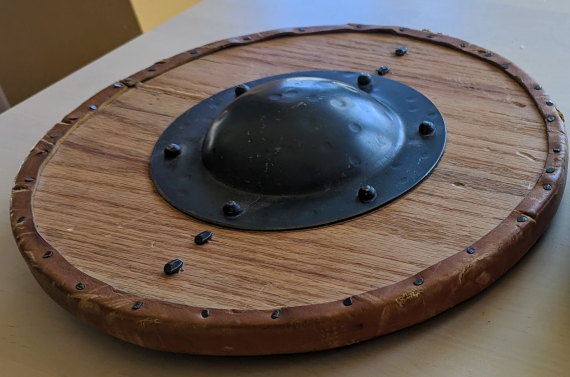 |